


简介
本文使用 Ubuntu 系统,用 Python 开发 ROS 2 ,用 camera_calibration 功能包标定相机,用 OpenCV 读取视频帧和转换 ROS 2 图像话题,用 MediaMTX 搭建流媒体服务器, 用 FFmpeg 将视频帧输出为视频流。
最终效果:
环境准备
虚拟机 VMware Workstation 安装 Ubuntu 桌面版
使用最新版的 VMware Workstation 安装 Ubuntu 22.04.2 LTS ,安装步骤略。
安装过程中最大磁盘大小建议 >= 50GB。默认的建议大小 20GB,在安装 ROS 2 时会不够。
Ubuntu 换源
华为开源镜像站_软件开发服务_华为云 (huaweicloud.com)
# 备份配置文件
sudo cp -a /etc/apt/sources.list /etc/apt/sources.list.bak

# 修改 **sources.list** 文件,将 http://archive.ubuntu.com 和 http://security.ubuntu.com 替换成 http://repo.huaweicloud.com
sudo sed -i "s@http://.*archive.ubuntu.com@http://repo.huaweicloud.com@g" /etc/apt/sources.list
sudo sed -i "s@http://.*security.ubuntu.com@http://repo.huaweicloud.com@g" /etc/apt/sources.list

# 更新存储库缓存
sudo apt update
安装 ROS 2
ROS(英语:Robot Operating System,一般译为机器人操作系统),是专为机器人软件开发所设计出来的一套电脑操作系统架构。它是一个开源的元级操作系统(后操作系统),提供类似于操作系统的服务,包括硬件抽象描述、底层驱动程序管理、共用功能的执行、程序间消息传递、程序发行包管理,它也提供一些工具和库用于获取、建立、编写和执行多机融合的程序。
官方安装文档:Ubuntu (Debian) — ROS 2 Documentation: Humble documentation
也可以使用小鱼的一键安装系列 | 鱼香 ROS。
- 设置语言环境
# 检查是否为 UTF-8 locale # 如果不是将其更新为 UTF-8 sudo apt update && sudo apt install locales sudo locale-gen zh_CN zh_CN.UTF-8 sudo update-locale LC_ALL=zh_CN.UTF-8 LANG=zh_CN.UTF-8 export LANG=zh_CN.UTF-8 # 再次检查 locale - 添加安装源
# 安装并启用 Ubuntu Universe 存储库 sudo apt install software-properties-common sudo add-apt-repository universe # 添加 ROS 2 GPG 密钥 sudo apt update && sudo apt install curl -y sudo curl -sSL https://raw.githubusercontent.com/ros/rosdistro/master/ros.key -o /usr/share/keyrings/ros-archive-keyring.gpg # 将存储库添加到 sources.list 文件中 echo "deb [arch=$(dpkg --print-architecture) signed-by=/usr/share/keyrings/ros-archive-keyring.gpg] http://packages.ros.org/ros2/ubuntu $(. /etc/os-release && echo $UBUNTU_CODENAME) main" | sudo tee /etc/apt/sources.list.d/ros2.list > /dev/null - 安装 ROS 2 包
# 更新存储库缓存和系统 sudo apt update sudo apt upgrade # 安装桌面版 ROS 2 sudo apt install ros-humble-desktop - 设置终端环境
echo "source /opt/ros/humble/setup.bash" >> ~/.bashrc - 安装 colcon,用于 ROS 2 开发功能包的构建、测试和安装。
sudo apt install python3-colcon-ros - 安装 rosdepc(rosdep 国内源),用于 ROS 2 安装功能包时自动安装依赖。
# 安装 pip 并设置源
sudo apt install python3-pip
pip config set global.index-url https://pypi.tuna.tsinghua.edu.cn/simple

sudo pip3 install rosdepc
# 指定 ROS 2 版本为 humble,安装 src 目录下所有功能包的依赖项
# $ rosdepc install -i -y --rosdistro humble --from-path src
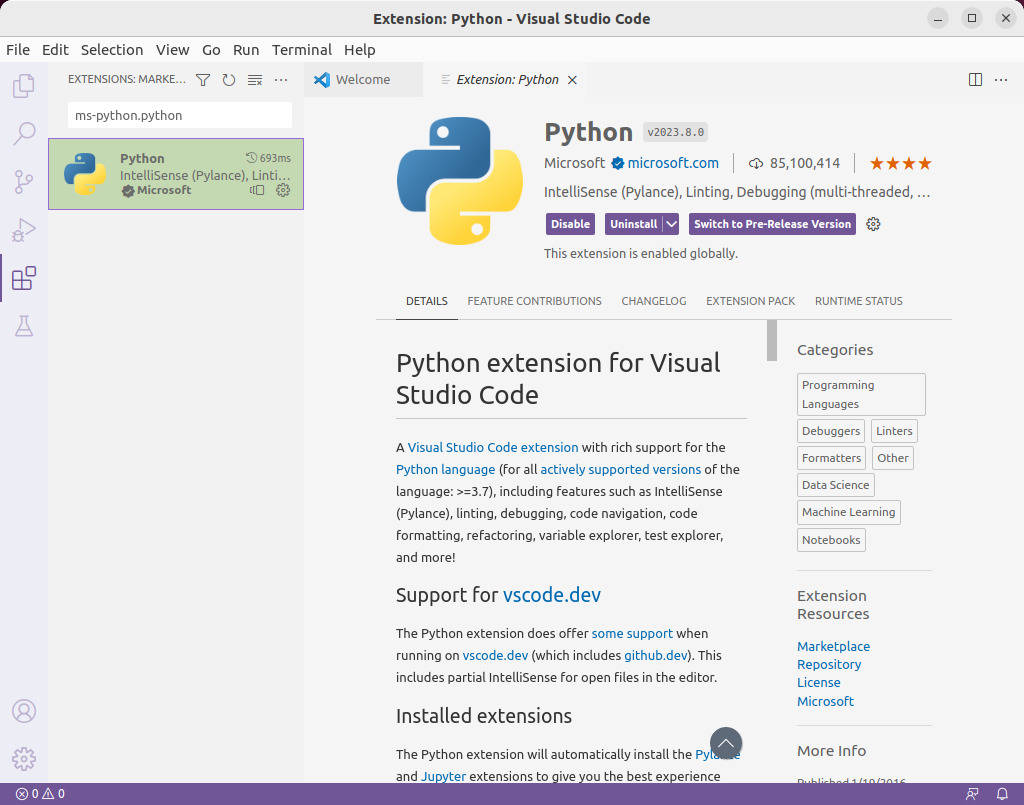
安装 Visual Studio Code
不需要二次开发直接用代码的话可以先不装。
-
dpkg 安装 deb 包。
sudo dpkg -i code_1.78.0-1683145611_amd64.deb -
安装扩展。
确定摄像头 RTSP 流
关于摄像头的配置,比如如何配置 IP 地址等略。
RTSP 格式
格式 1
rtsp://[username]:[password]@[ip]:[port]/[codec]/[channel]/[subtype]/av_stream
- username:用户名。
- password:密码。
- ip:设备 IP。
- port:端口号,默认为 554,若为默认可以为空。
- codec:视频编码格式。例如 h264、MPEG-4、mpeg4 等。
- channel:通道号,从 1 开始。例如通道 1 是 ch1。
- subtype:码流类型,主码流为 main,辅码流为 sub。
格式 2
rtsp://username:password@ip:port/cam/realmonitor?channel=1&subtype=0
- username:用户名。
- password:密码。
- ip:设备 IP。
- port:端口号,默认为 554,若为默认可以为空。
- channel:通道号,从 1 开始。例如通道 1 是 channel=1。
- subtype:码流类型,主码流为 0,子码流为 1。例如 subtype=0。
不同品牌的摄像头
USB 摄像头
使用 usb_cam 功能包连接,本文章主要是通过网络摄像头连接,USB 摄像头有机会再测试。
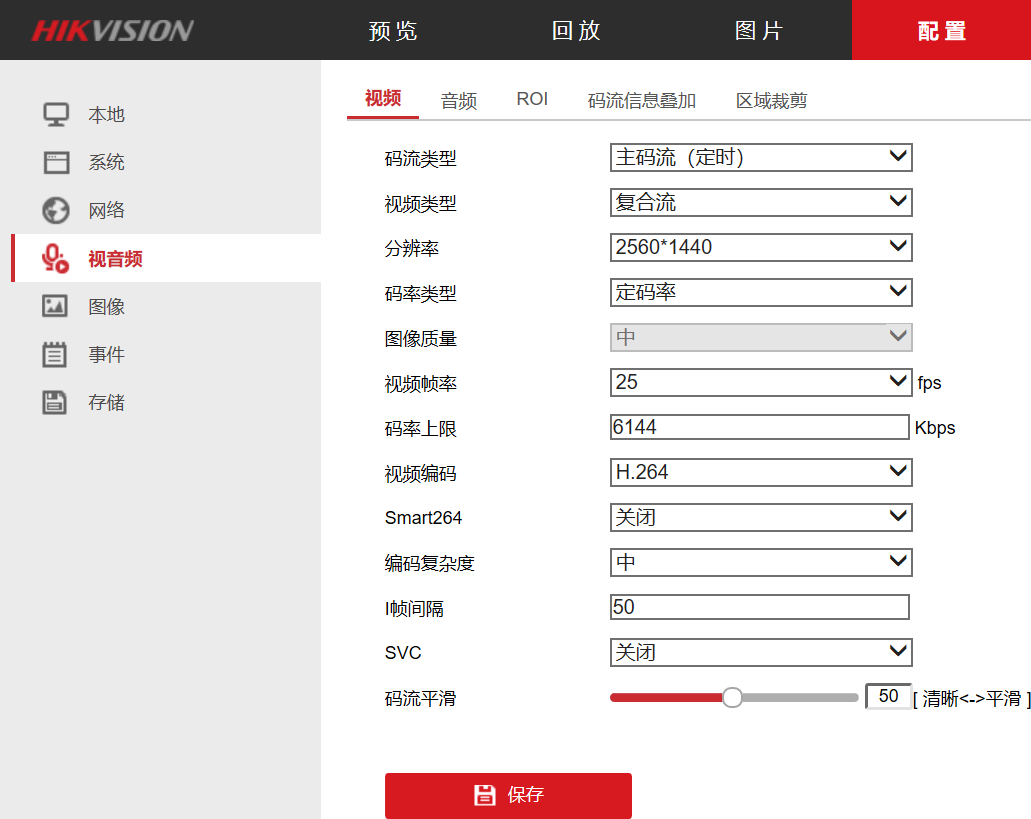
海康威视
主码流:
rtsp://admin:12345@192.168.1.64:554/h264/ch1/main/av_stream
rtsp://admin:12345@192.168.1.64:554/MPEG-4/ch1/main/av_stream
子码流:
rtsp://admin:12345@192.168.1.64/mpeg4/ch1/sub/av_stream
rtsp://admin:12345@192.168.1.64/h264/ch1/sub/av_stream
是主码流还是子码流可以在海康威视的后台的配置 - 视音频 - 视频中查看。
大华
rtsp://admin:123456@192.168.1.64:554/cam/realmonitor?channel=2&subtype=1
TP-LINK
主码流:rtsp://admin:123456@192.168.1.60:554/stream1
子码流:rtsp://admin:123456@192.168.1.60:554/stream2
播放测试可用性
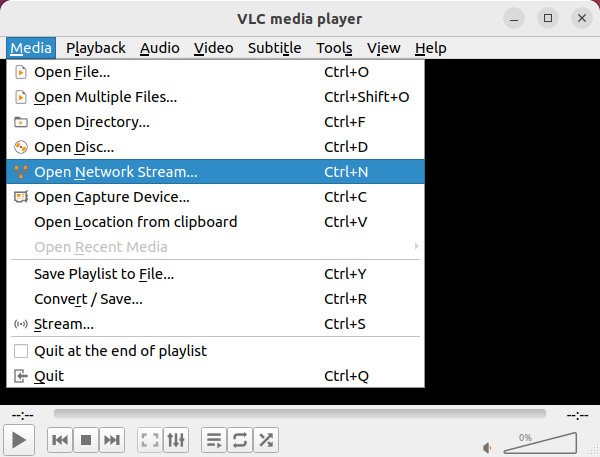
VLC media player
- 安装。
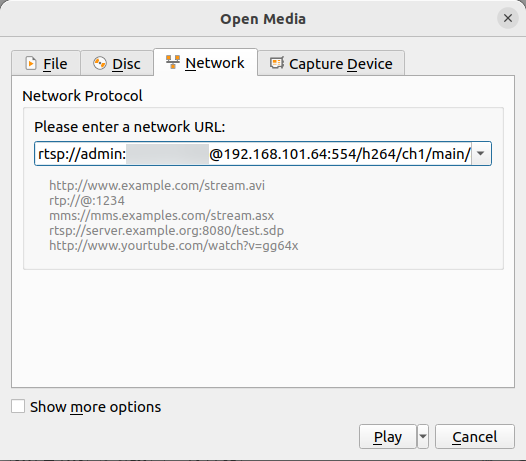
VLC media player for Ubuntu - VideoLAN# 1. apt 安装 vlc sudo apt install vlc # 2. 【推荐】安装 snap 版本的 vlc sudo snap install vlc - 打开网络串流(Ctrl + N),输入地址后 Play,有画面正常播放即可。
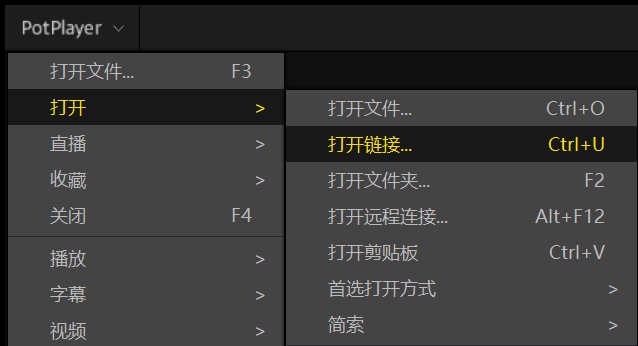
PotPlayer(不支持 Linux)
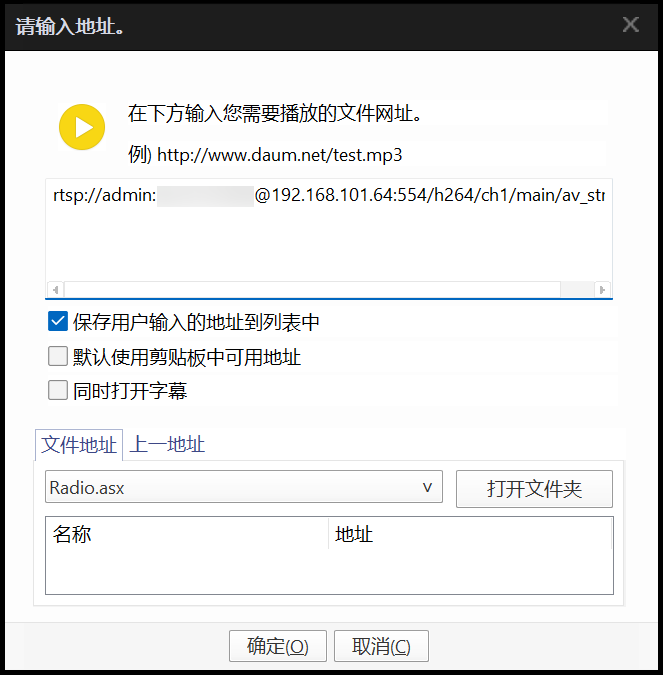
左键单击 PotPlayer 左上角或在主界面右键打开 - 打开链接(Ctrl + U),输入地址后确定,有画面正常播放即可。
开发测试
将 RTSP 视频流转换为图片话题的 ROS 2 功能包
参考:ros2+opencv抓取rtsp视频流_sensor_msgs::image::sharedptr_casiaros的博客-CSDN博客
-
创建项目。
# 创建工作空间
~$ mkdir -p camera_correction/src
# 创建功能包
~$ cd camera_correction/src
~/camera_correction/src$ ros2 pkg create stream_to_topic --build-type ament_python --dependencies rclpy
# 新建节点(Node)
~/camera_correction/src$ touch stream_to_topic/stream_to_topic/main.py
# vscode 打开工作空间
~/camera_correction/src$ code ..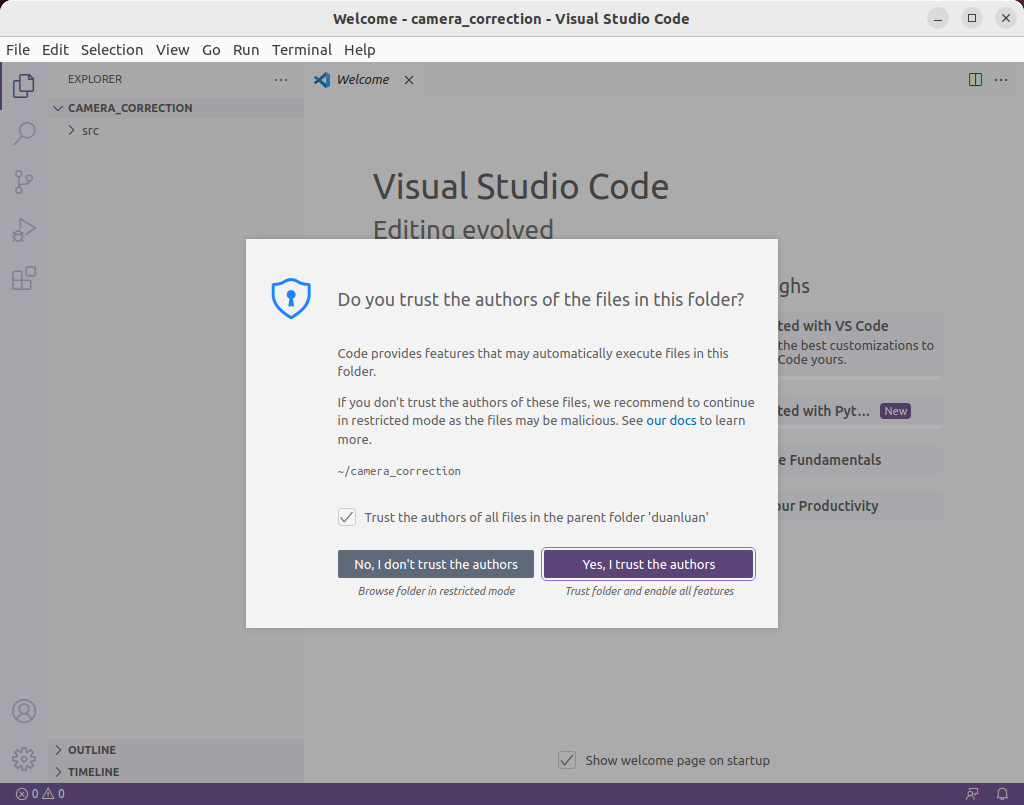
-
编写节点
src/stream_to_topic/stream_to_topic/main.py。#!/usr/bin/env python3 import argparse import threading import cv2 import numpy as np import rclpy from cv_bridge import CvBridge from rclpy.node import Node from sensor_msgs.msg import Image from std_msgs.msg import Header class StreamToTopic(Node): """视频流转 ROS 2 Topic""" def __init__(self, stream): # 参数为节点名,运行后可以通过 ros2 node list 查看 super().__init__('stream_to_topic_main') self.stream = stream # 消息发布对象 self.publisher_ = self.create_publisher( # 发布的消息类型(ros2 topic type xxx) Image, # 话题(Topic)名称 '/stream_to_topic/stream_image', # 消息队列容量大小,缓存发布者和订阅者之间的消息 100) # OpenCV 图像和 ROS 图像互转的对象 self.bridge = CvBridge() self.read_callback() def read_callback(self): """ 读取视频流的视频帧,转换为 ROS 图像后发布为话题 """ # 打开视频流,读取 RTMP 需安装 ffmpeg cap = cv2.VideoCapture(self.stream) while True: # 读取视频帧。ret 为是否成功读取图像。frame 为读取到的视频帧,是一个矩阵类(Matrix),存储图像的像素值等。 ret, frame = cap.read() if ret: # 将矩阵类转换为 NumPy cv_image = np.array(frame) # ROS2 消息头 header = Header() # 在消息头中记录当前时间戳,用于和其他消息对齐,计算消息延迟等。 header.stamp = self.get_clock().now().to_msg() # 将 OpenCV 图像转换为 ROS 图像 ros_image = self.bridge.cv2_to_imgmsg(cv_image, encoding="bgr8") # ROS 图像设置消息头 ros_image.header = header # 发布转换后的图像消息 self.publisher_.publish(ros_image) def main(args=None): rclpy.init(args=args) # 获取参数 parser = argparse.ArgumentParser() parser.add_argument('-s', help='video stream URL') args = parser.parse_args() # 创建视频流发布类 stream_subscriber = StreamToTopic(args.s) # 保持节点运行 rclpy.spin(stream_subscriber) # 关闭节点 stream_subscriber.destroy_node() # 关闭 rclpy rclpy.shutdown() if __name__ == '__main__': main() -
将节点添加到``src/stream_to_topic/setup.py`
from setuptools import setup package_name = 'stream_to_topic' setup( name=package_name, version='0.0.0', packages=[package_name], data_files=[ ('share/ament_index/resource_index/packages', ['resource/' + package_name]), ('share/' + package_name, ['package.xml']), ], install_requires=['setuptools'], zip_safe=True, maintainer='duanluan', maintainer_email='duanluan@todo.todo', description='TODO: Package description', license='TODO: License declaration', tests_require=['pytest'], entry_points={ 'console_scripts': [ # 将视频流转换为 ROS 2 话题,格式:节点名 = 功能包名.节点名:方法名 'main = stream_to_topic.main:main' ], }, ) -
编译节点。
# 在工作空间下编译 ~/camera_correction$ colcon build # 如果编译过程中出现 SetuptoolsDeprecationWarning: setup.py install is deprecated 的提示,可以忽略,也可以更新 setuptools:https://fishros.org.cn/forum/post/991 sudo pip install setuptools==58.2.0 --upgrade -
添加环境。
~/camera_correction$ source install/setup.sh -
运行节点。
ros2 run stream_to_topic main -s rtsp://admin:123456@192.168.101.64:554/h264/ch1/main/av_stream -
查看节点和话题。
# 查看节点
$ ros2 node list
/stream_to_topic_main

# 查看话题
$ ros2 topic list
/stream_to_topic/stream_image
标定相机获取参数文件 ost.yaml
-
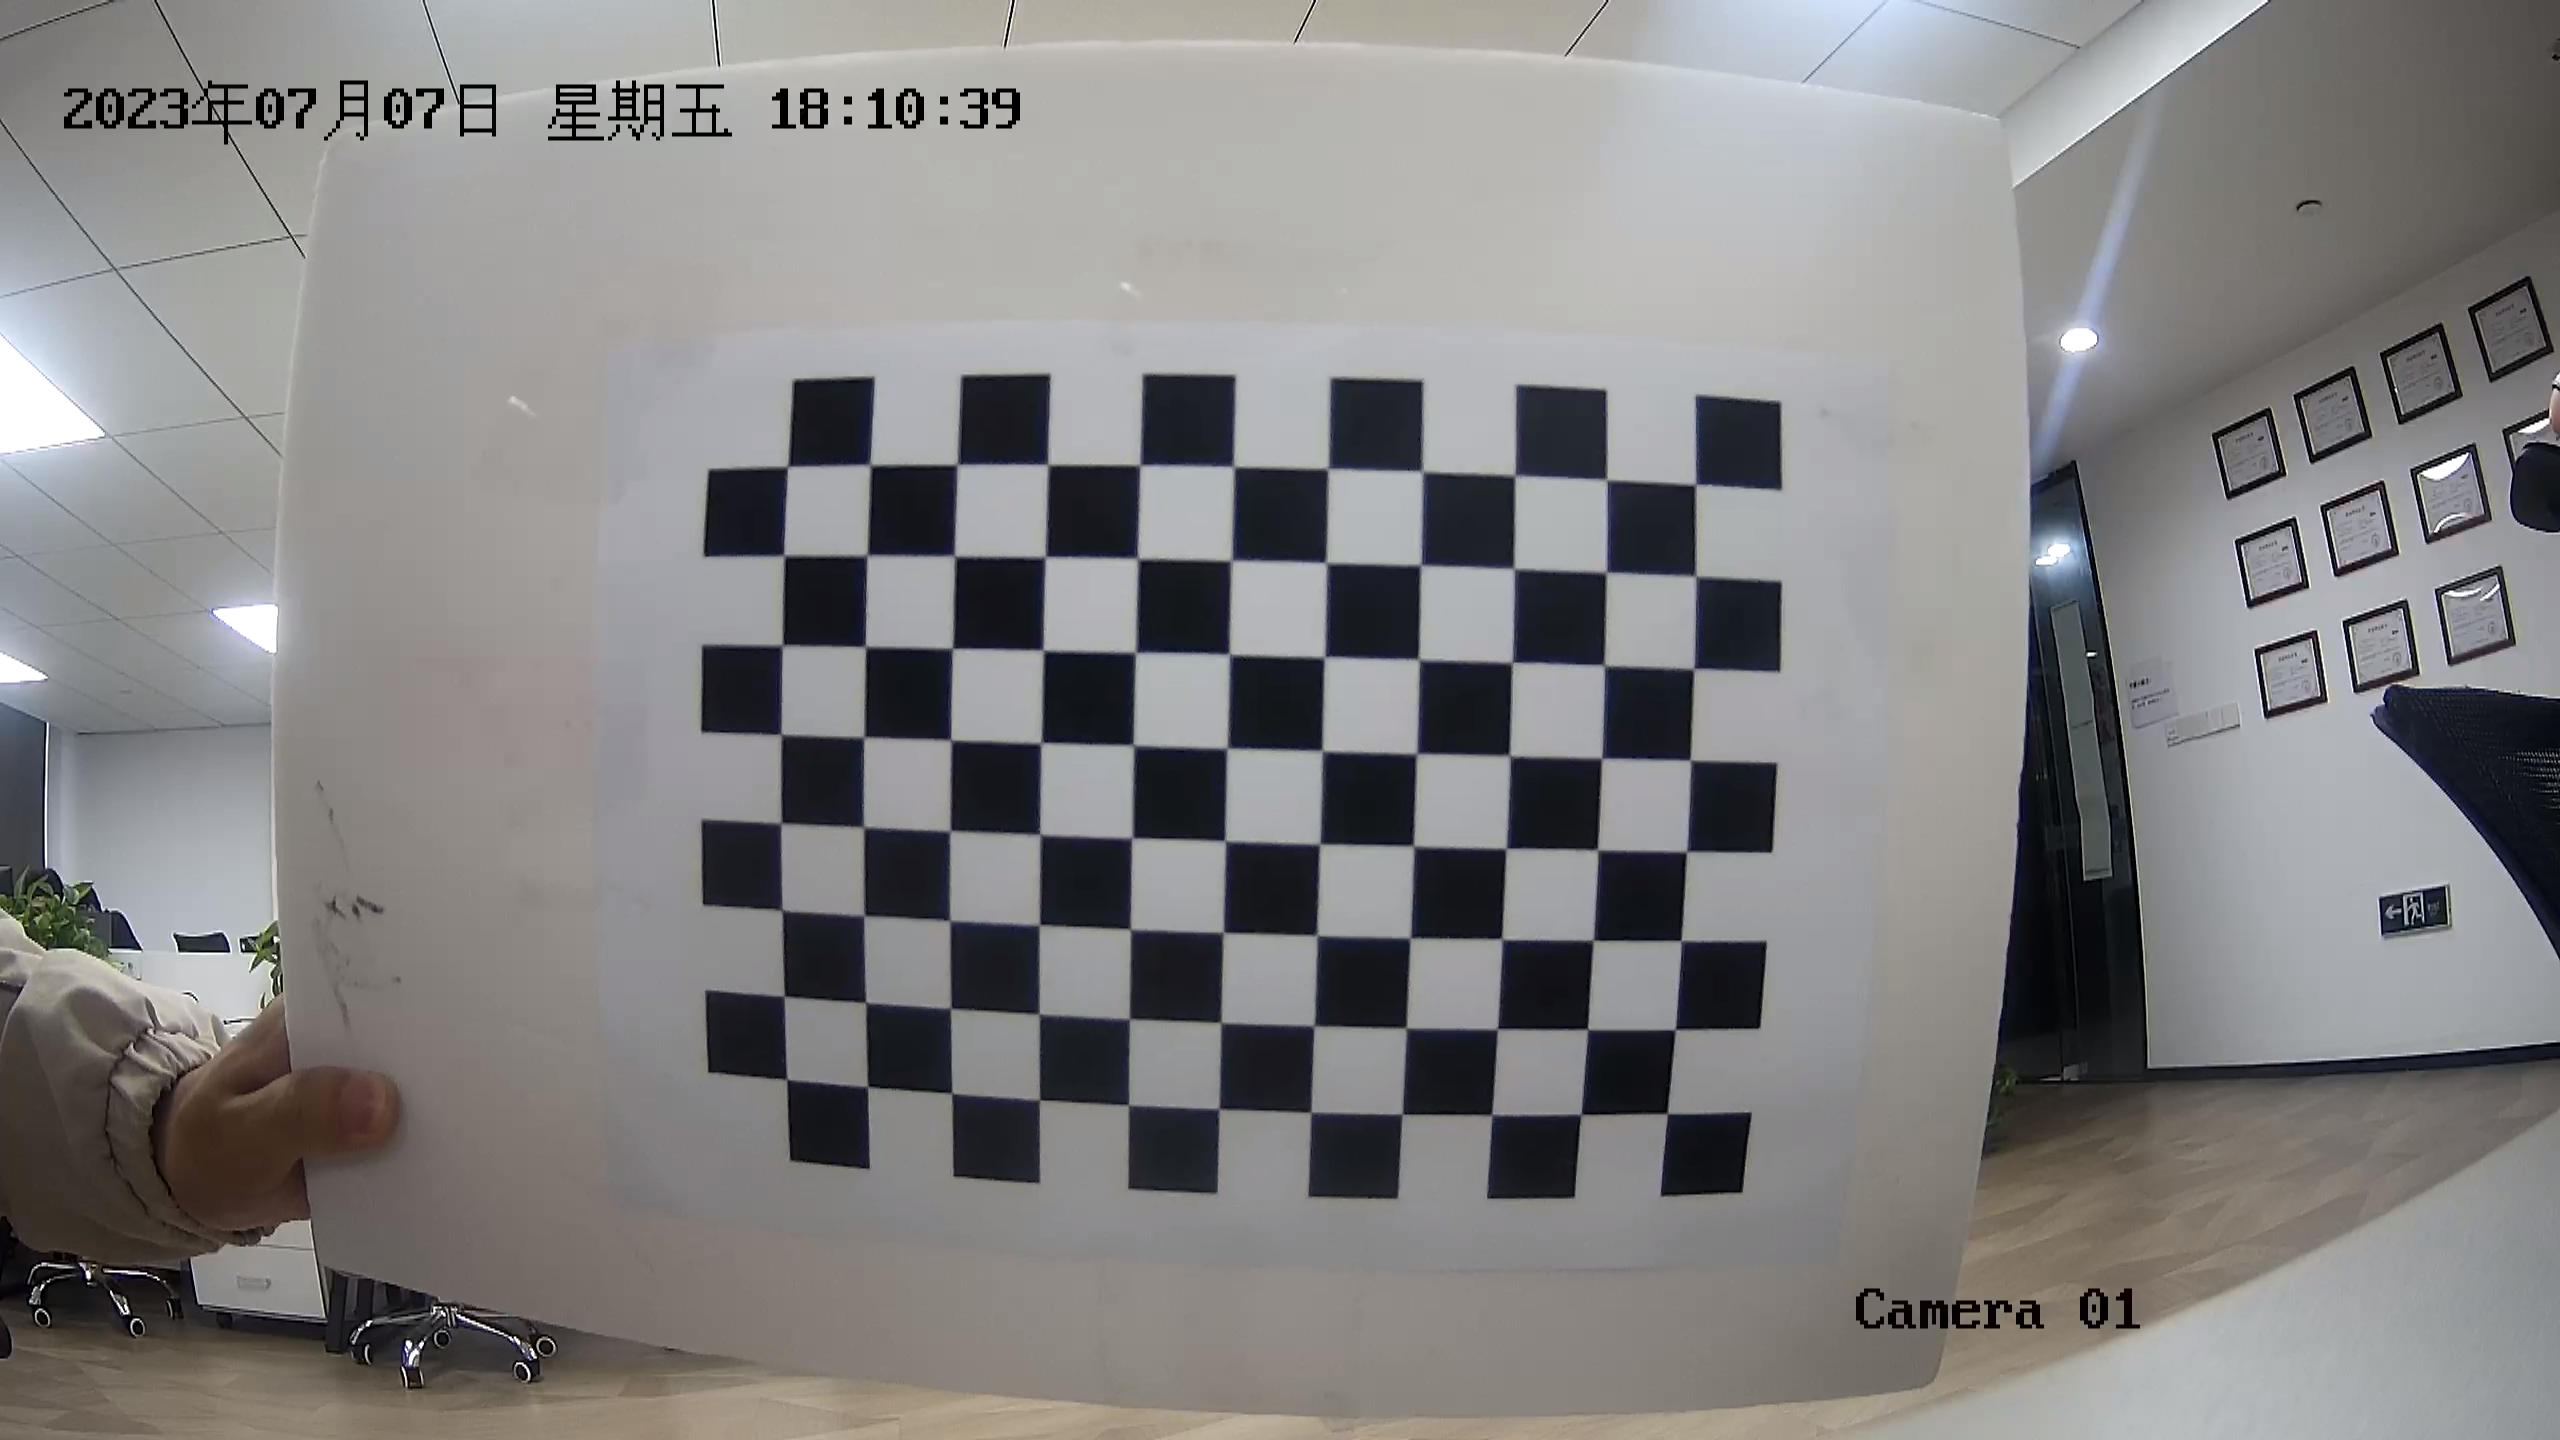
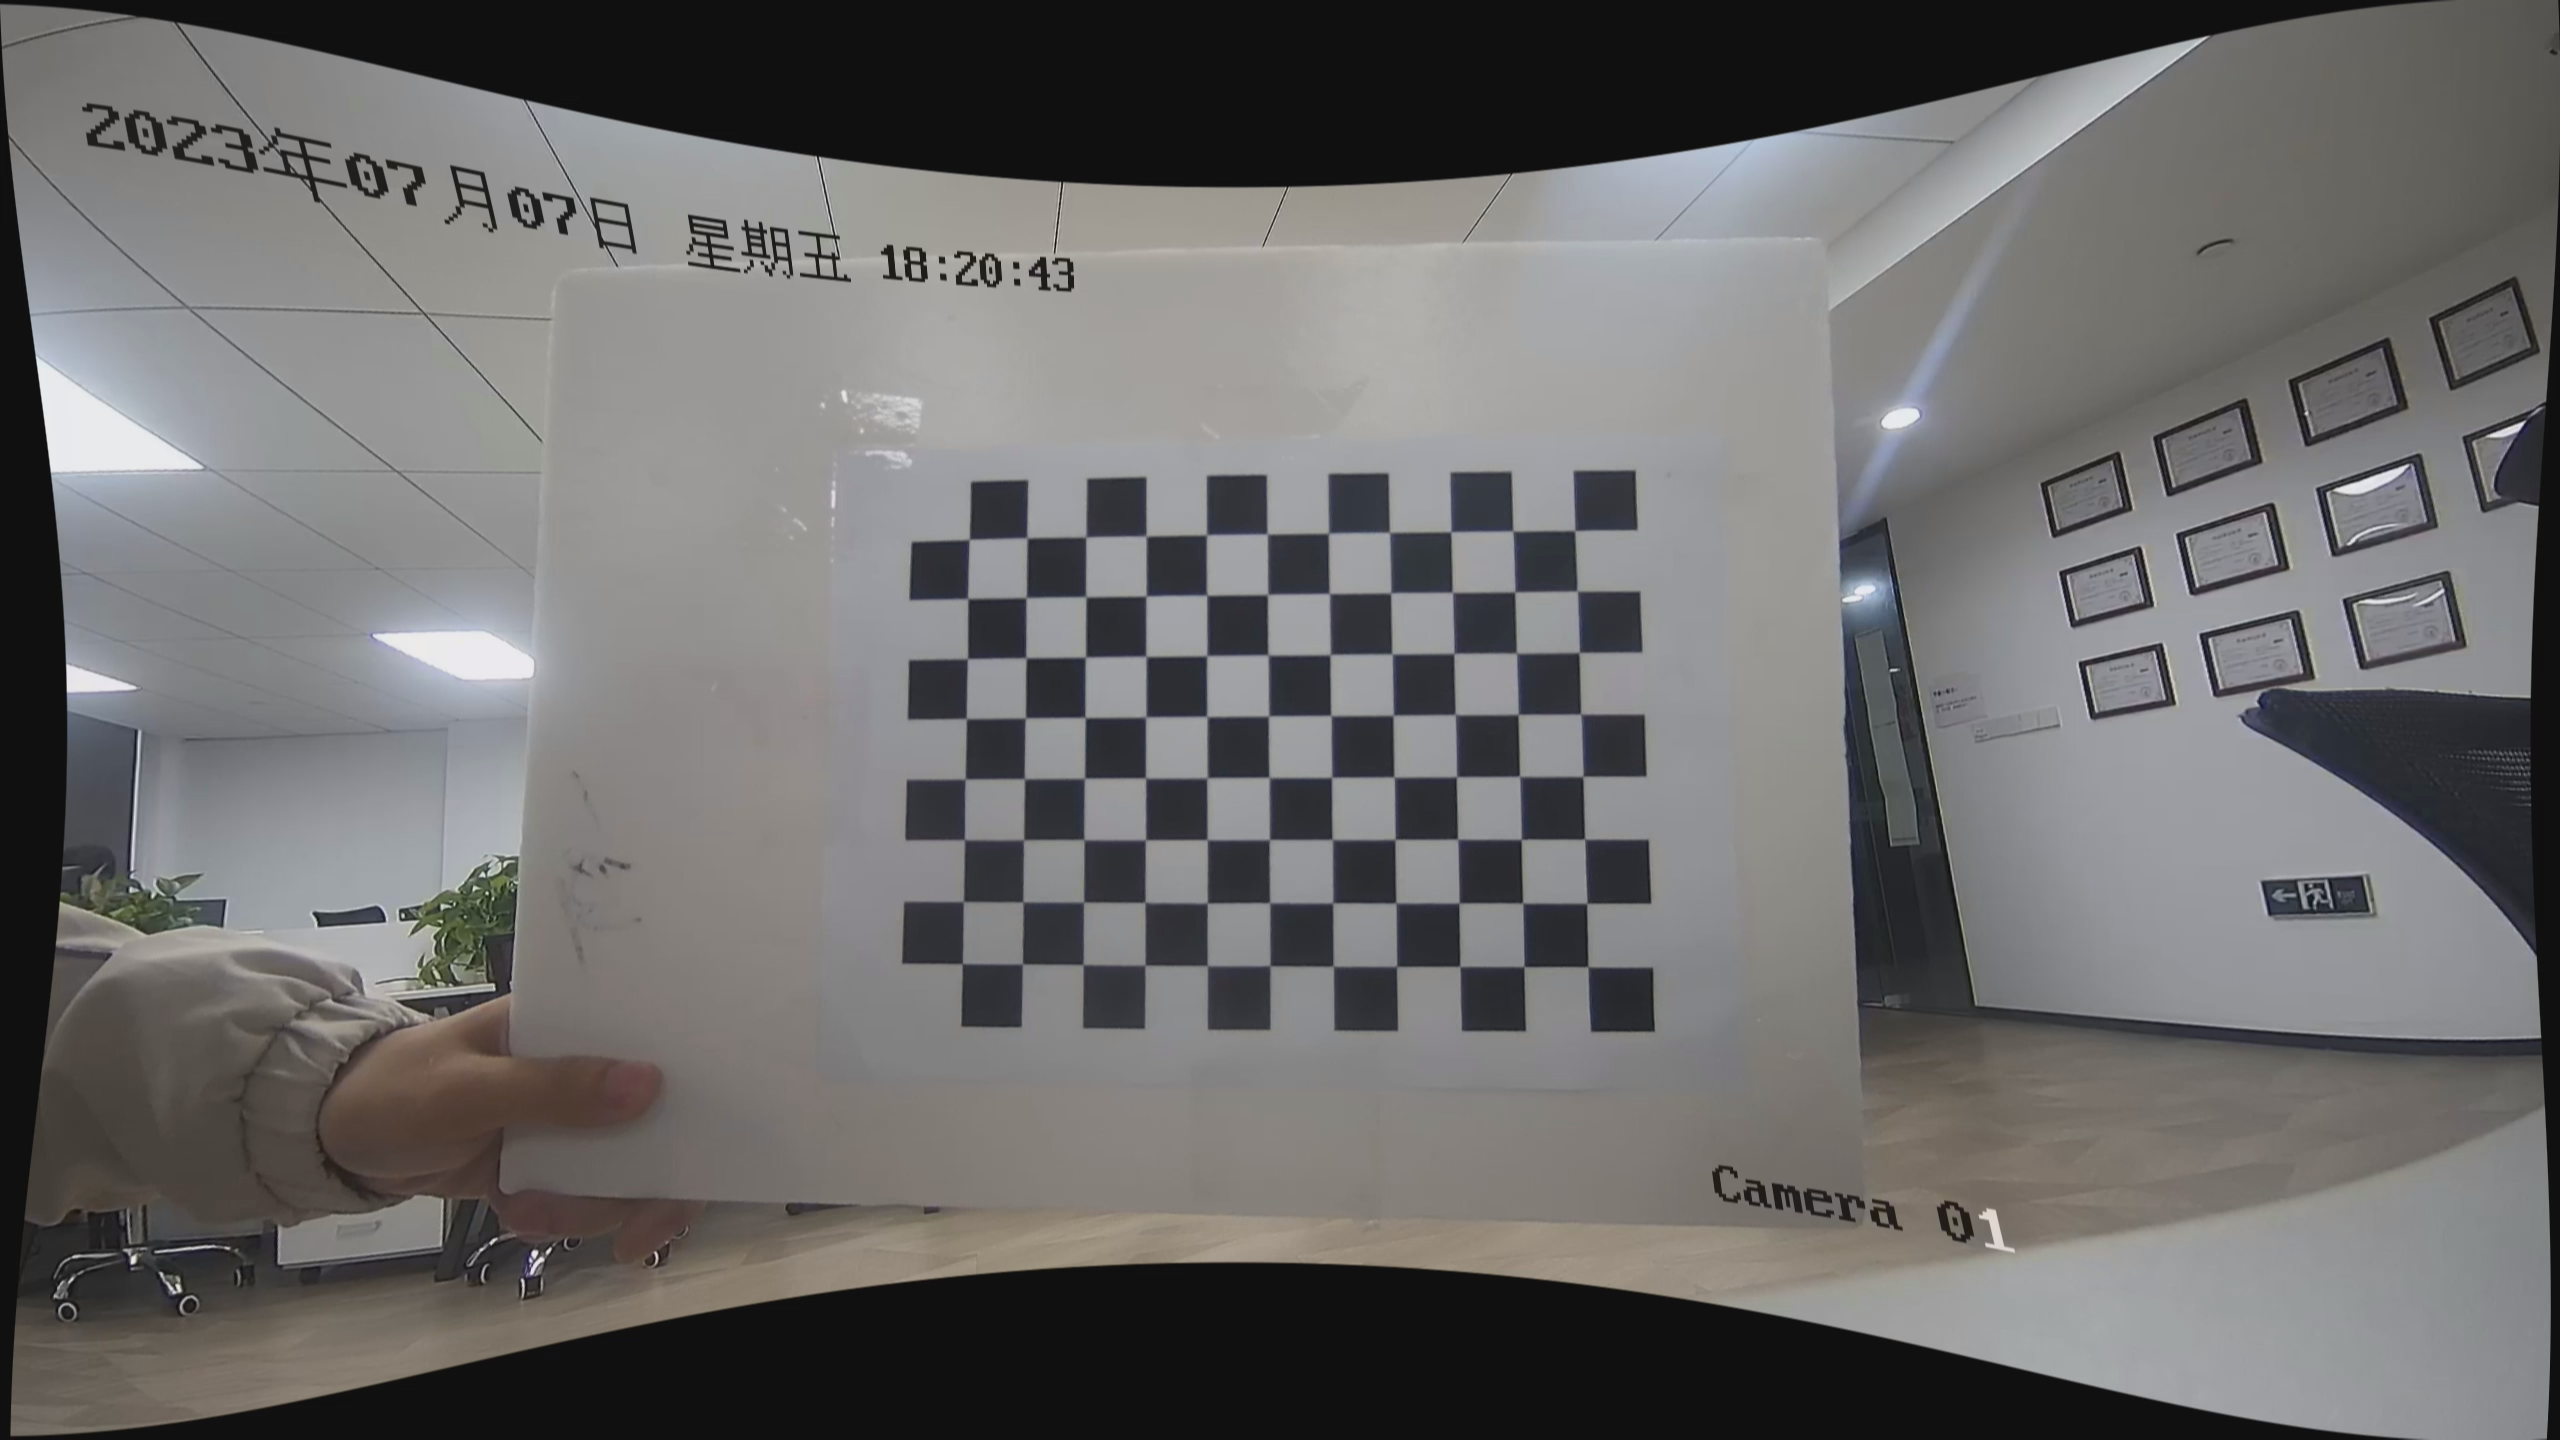
确定标定板
相机标定中各种标定板介绍以及优缺点分析 | Jakob W、ronghuaiyang
根据经验,当正面观察时,标定板的面积至少应该是可用像素面积的一半。
标定板生成:Camera Calibration Pattern Generator – calib.io
此处使用的是 A4 纸打印,打印时比例为原比例,DPI 调到最高,最后贴在一个平面的板上。打印的缺点在于打印机的精度有限,粘贴时无法做到完全平整,会对标定结果有影响。
-
安装 camera_calibration 功能包并启动。
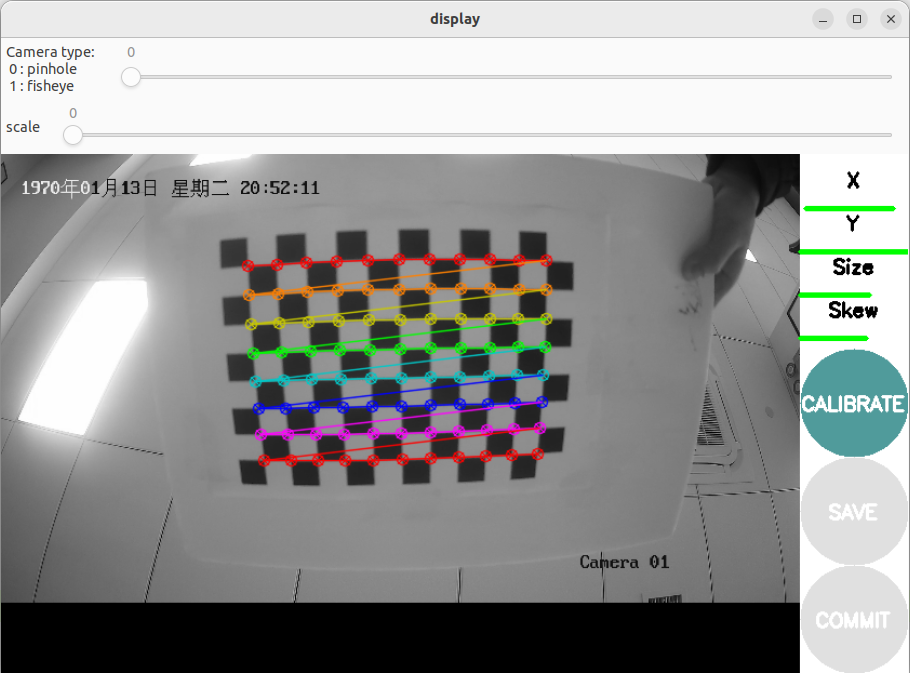
# 安装 camera_calibration 功能包,其中 humble 为 ROS 版本 sudo apt install ros-humble-camera-calibration # 启动标定程序。size 为 横向内角点x纵向内角点,square 为方格边长(单位米),remap 为图像话题来源,就是视频流转换后的话题 ros2 run camera_calibration cameracalibrator --size 11x8 --square 0.02 --ros-args --remap image:=/stream_to_topic/stream_image -
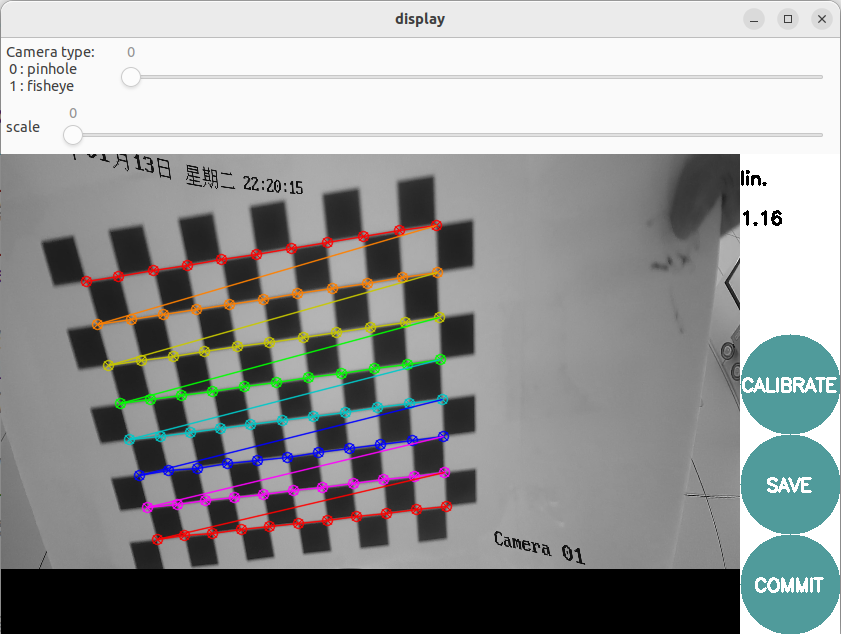
将标定板左右上下前后倾斜移动,直到 X、Y、Size(大小)、Skew(倾斜)这几项都变成绿色,点击 CALIBRATE(校准)按钮可以看到矫正效果。
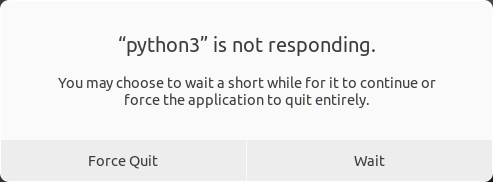
如果虚拟机的配置不够,可能会提示如下,不用点 Wait,等待一段时间。
-
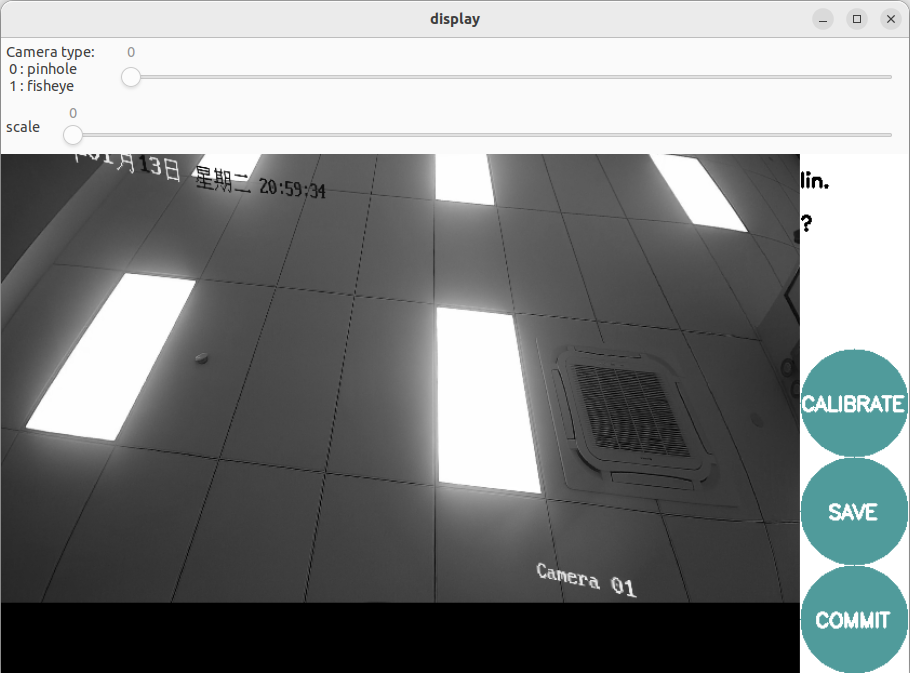
再将标定板放在相机视野内,右上角会显示标定结果的 lin.(线性误差),这个值越低越好,低于 0.1 最好,但是我这里是 A4 纸,所以数值比较大。
-
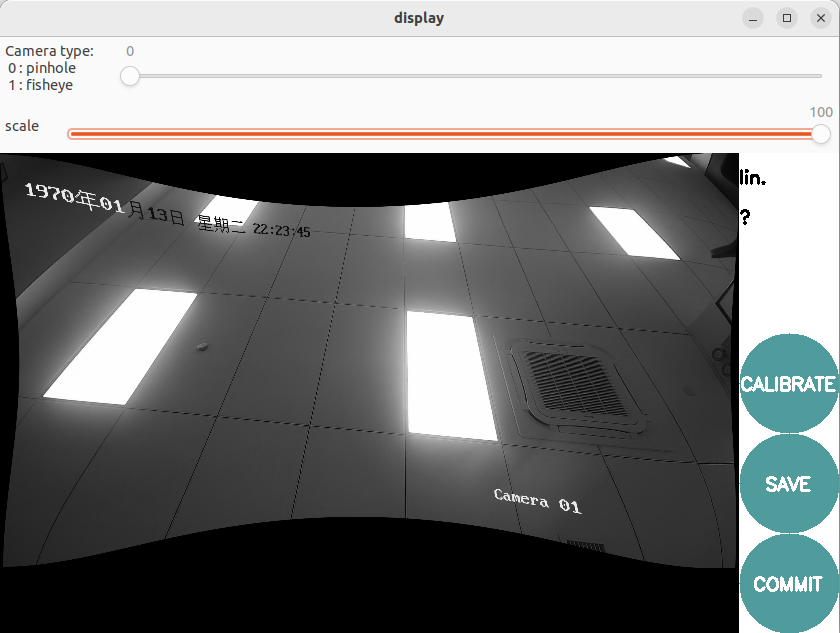
也可以调节 Camera type 来选择相机类型,调节 scale 来控制显示多少画面。
-
最后点击 SAVE 按钮可以保存参数文件到
/tmp/calibrationdata.tar.gz,其中的ost.txt和ost.yaml就是参数文件。
OpenCV 读取参数文件输出畸变纠正后的新视频流
理论上来说,ROS 2 应该可以 launch 使用参数文件,但是应该还要开发一个新的功能包,将ost.yaml发布为一个话题,然后再怎么使用,待研究。
- 安装 MediaMTX。
# 下载解压 wget https://github.com/aler9/mediamtx/releases/download/v0.22.2/mediamtx_v0.22.2_linux_amd64.tar.gz sudo mkdir /opt/mediamtx sudo tar xzvf mediamtx_v0.22.2_linux_amd64.tar.gz -C /opt/mediamtx # 添加环境变量 echo 'export PATH="$PATH:/opt/mediamtx"' >> ~/.bashrc source ~/.bashrc - 安装 FFmpeg 。
sudo apt install ffmpeg - 创建项目。可以创建项目在其他目录,也可以直接建在 ROS 2 功能包的工作空间中。
mkdir ~/Downloads/calibrationdata # 解压标定结果 tar zxvf /tmp/calibrationdata.tar.gz -C ~/Downloads/calibrationdata # 创建新项目和配置目录 mkdir -p ~/mkdir ~/camera_correction/src/ost_to_stream/config touch ~/camera_correction/src/ost_to_stream/main.py # 将 ost.yaml 配置文件复制到新项目配置目录中 cp ~/Downloads/calibrationdata/ost.yaml ~/camera_correction/src/ost_to_stream/config/ - 编写下列文件,将视频流纠正后输出为文件,再调用 FFmpeg 输出为视频流。
~/camera_correction/ost_to_stream/config/mediamtx.yml,参考 sample configuration file。readBufferCount: 1024 rtmpDisable: yes hlsDisable: yes webrtcDisable: yes paths: # 对应着输出的 RTSP 中 rtsp://localhost:8554/test 的 test test: source: publisher sourceProtocol: tcp~/camera_correction/ost_to_stream/config.yml# 源视频 video: # 视频流地址 stream: rtsp://admin:123456@192.168.1.64:554/h264/ch1/main/av_stream # 打开视频流失败后重新打开的等待时长(秒) capture_error_wait_time: 5 # 相机参数文件路径 camera_info_file_path: config/ost.yaml # 输出视频 output: # 文件路径 file_path: /tmp/output.mp4 # 宽度 width: 2560 # 高度 height: 1440 # 编码器 fourcc: H264 # 帧率 fps: 25.0 # 最大读取视频帧失败连续次数 max_not_ret_count: 5 # 矫正图像的插值方式 # INTER_NEAREST:最近邻插值,速度最快,但图像质量较差。 # INTER_LINEAR:双线性插值,速度较快,图像质量较好。 # INTER_CUBIC:双立方插值,速度较慢,图像质量较好。 # INTER_LANCZOS4:Lanczos 插值,速度最慢,图像质量最好。 interpolation: INTER_LINEAR # mediamtx 流媒体服务器 mediamtx: # mediamtx 路径 bin_path: /opt/mediamtx/mediamtx # mediamtx 配置文件路径 config_file_path: config/mediamtx.yml # 将矫正后的视频帧转换为 RTSP ffmpeg_cmd: ffmpeg -y -f rawvideo -pix_fmt bgr24 -s 2560x1440 -r 25 -i - -vcodec h264 -preset ultrafast -f rtsp rtsp://localhost:8554/test~/camera_correction/ost_to_stream/main.py:import re import subprocess import threading import time import cv2 import numpy as np import os import yaml class MediamtxThread(threading.Thread): """将视频流校正后输出为文件""" def __init__(self, config): super().__init__() mediamtx_config = config['mediamtx'] self.mediamtx_bin_path = mediamtx_config['bin_path'] self.mediamtx_config_file_path = mediamtx_config['config_file_path'] # 如果输出视频文件路径非绝对路径,则从当前文件所在目录开始 if not os.path.isabs(self.mediamtx_config_file_path): self.mediamtx_config_file_path = os.path.join(os.path.dirname(os.path.abspath(__file__)), self.mediamtx_config_file_path) self.run_cmd = '{} {}'.format(self.mediamtx_bin_path, self.mediamtx_config_file_path) def run(self): # 杀死 mediamtx subprocess.run("ps aux | grep '{}' | grep -v grep > /dev/null && kill -9 $(ps aux | grep '{}' | grep -v grep | awk '{{print $2}}')".format(self.run_cmd, self.run_cmd), shell=True) # 启动 mediamtx subprocess.Popen([self.mediamtx_bin_path, self.mediamtx_config_file_path]) def stop(self): # 杀死 mediamtx subprocess.run("ps aux | grep '{}' | grep -v grep > /dev/null && kill -9 $(ps aux | grep '{}' | grep -v grep | awk '{{print $2}}')".format(self.run_cmd, self.run_cmd), shell=True) class VideoCaptureThread(threading.Thread): """将视频流校正后输出为文件""" def __init__(self, config): super().__init__() # 当前文件所在目录 current_dir_path = os.path.dirname(os.path.abspath(__file__)) video_config = config['video'] # 视频流地址 self.video_stream = video_config['stream'] # 等待时间 self.video_capture_error_wait_time = video_config['capture_error_wait_time'] # 相机参数文件路径 camera_info_file_path = video_config['camera_info_file_path'] # 如果相机参数文件路径非绝对路径,则从当前文件所在目录开始 if not os.path.isabs(camera_info_file_path): camera_info_file_path = os.path.join(current_dir_path, camera_info_file_path) # 读取相机参数文件 with open(camera_info_file_path, 'r') as f: camera_info = yaml.safe_load(f) output_config = config['output'] # 输出视频文件路径 self.output_file_path = output_config['file_path'] # 如果输出视频文件路径非绝对路径,则从当前文件所在目录开始 if not os.path.isabs(self.output_file_path): self.output_file_path = os.path.join(current_dir_path, self.output_file_path) # 输出视频宽度,如果为空就从相机参数文件中获取 self.output_video_width = int(output_config.get('width', camera_info['image_width'])) # 输出视频高度,如果为空就从相机参数文件中获取 self.output_video_height = int(output_config.get('height', camera_info['image_height'])) # 输出视频编码器 self.output_video_fourcc = cv2.VideoWriter_fourcc(*output_config['fourcc']) # 输出视频帧率 self.output_video_fps = output_config['fps'] # 最大读取视频帧失败连续次数 self.max_not_ret_count = config['max_not_ret_count'] # 矫正图像的插值方式 self.interpolation = config['interpolation'] # 内参矩阵 K = np.array(camera_info['camera_matrix']['data']).reshape((3, 3)) # 畸变系数 D = np.array(camera_info['distortion_coefficients']['data']) # 旋转矩阵 R = np.array(camera_info['rectification_matrix']['data']).reshape( (3, 3)) # 投影矩阵 P = np.array(camera_info['projection_matrix']['data']).reshape((3, 4)) # 校正映射表 map1 和 map2 self.map1, self.map2 = cv2.initUndistortRectifyMap( K, D, R, P[:, :3], (camera_info['image_width'], camera_info['image_height']), cv2.CV_32FC1) # FFmpeg 命令 self.ffmpeg_cmd = config['ffmpeg_cmd'] def video_capture(self): """循环打开视频流,直到成功""" while True: # 打开视频流 self.cap = cv2.VideoCapture(self.video_stream) if self.cap.isOpened(): break else: print('Failed to open video stream, retrying in 5 seconds...') # 失败后等待指定秒 time.sleep(self.video_capture_error_wait_time) def run(self): self.is_running = True self.video_capture() # self.out = cv2.VideoWriter( # # 输出视频的路径 # self.output_file_path, # # 视频编码器,支持硬件加速的话可以使用 h264_nvenc 等 # self.output_video_fourcc, # # 输出视频的帧率 # self.output_video_fps, # # 输出视频的宽高 # (self.output_video_width, self.output_video_height)) # 使用 ffmpeg 将视频转换为 RTSP 流 ffmpeg_process = subprocess.Popen(self.ffmpeg_cmd.split(), stdin=subprocess.PIPE) # 读取视频帧失败次数 not_ret_count = 0 while self.is_running: try: # 读取视频帧 ret, frame = self.cap.read() if not ret: # 连续读取视频帧失败指定次后抛出异常 not_ret_count += 1 if not_ret_count < self.max_not_ret_count: continue raise Exception('Failed to read frame from video stream') if not_ret_count != 0: # 读取视频帧成功时清零,即忽略非连续失败 self.not_ret_count = 0 # 矫正图像 img_rect = cv2.remap(frame, self.map1, self.map2, getattr(cv2, self.interpolation)) # 将矫正后的图像写入 VideoWriter 对象中,输出为文件 # self.out.write(img_rect) # 直接显示图像 # cv2.imshow('frame', frame) # cv2.imshow('img_rect', img_rect) # if cv2.waitKey(1) == ord('q'): # break # 将矫正后的视频帧转换为 RTSP ffmpeg_process.stdin.write(img_rect.tobytes()) except Exception as e: print(e) self.release() # 读取视频帧失败后重新打开视频流 self.video_capture() def release(self): # 释放摄像头 self.cap.release() # 释放视频输出 # self.out.release() def stop(self): self.is_running = False self.release() def main(args=None): # 读取配置文件 with open(os.path.join(os.path.dirname(os.path.abspath(__file__)), 'config.yml'), 'r') as f: config = yaml.safe_load(f) mediamtx_thread = MediamtxThread(config) mediamtx_thread.start() video_capture_thread = VideoCaptureThread(config) video_capture_thread.start() if __name__ == '__main__': main() - 使用 VLC 测试播放。
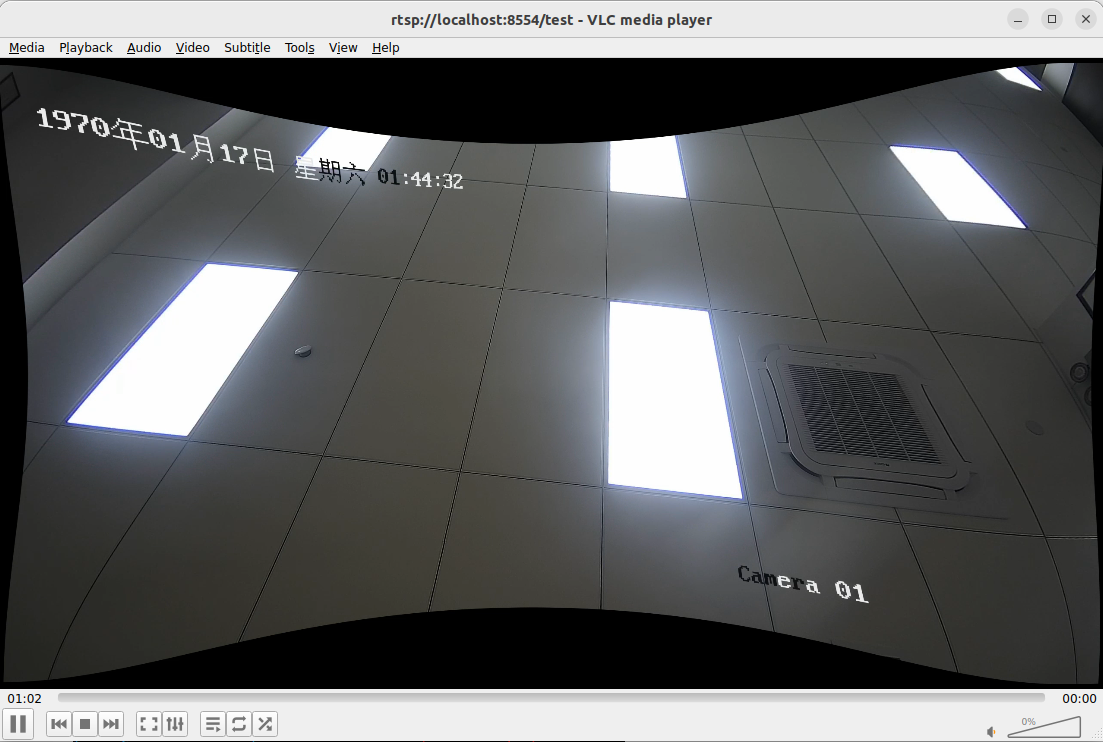
- 如果卡顿的话,还可以使用 FFmpeg 的硬件加速(Intel、AMD、NVIDIA)。
评论区